Question:
How can I set the initial and final dates to print a report for a given period?
Solution:
In the report’s query, insert a filter in the field E3TimeStamp and fill it in according to the figure below:
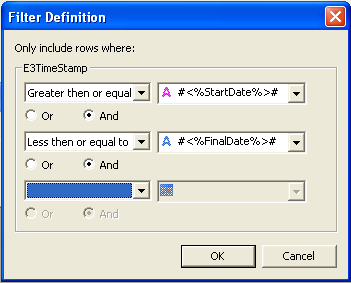
StartDate and FinalDate are variables used in the filter. These variables receive both the initial and the final dates, which are chosen by the user to apply the filter, from setpoints located on a screen.
Insert two setpoints onto a screen, called “spInitialDate” and “spEndDate”, respectively. On both setpoints’ Click() event, use the script below to open a pop-up window for selecting the dates:
IF Application.ShowDatePicker(DateTime, 0, 0) THEN
     Value = DateTime
END IF
On the button that prints the report, use the script below:
IniDate = Screen.Item("spInitialDate").Value
EndDate = Screen.Item("spEndDate").Value

Set Report = Application.LoadReport("[Report1]")
Report.Item("Query1").SetVariableValue "StartDate", IniDate
Report.Item("Query1").SetVariableValue "FinalDate", EndDate
Report.PrintPreview()
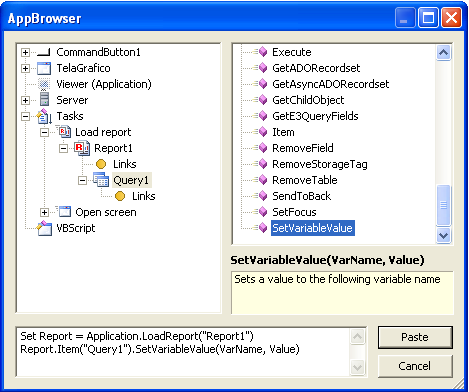
To set the script above, you must use the AppBrowser according to the figure below, replacing VarName with StartDate (which is the variable previously created in the query’s E3TimeStamp filter), and Value with IniDate (which is the local variable receiving the initial date chosen by the user at “spInitialDate”). The same procedure must also be performed for the final date.