To create a Historic, first make sure the Domain has a DBServer. To add one to the Domain, right-click the project and select the option Insert – > Database, and set it up to access a valid database.
After the DBServer has been checked, insert a new historic to the project following similar guidelines: right-click the project, and select the option Insert – > Historic. The Hist1 item will be created, and a settings window will be displayed. On it, create the historic fields and set up how they should be saved. In the figure below, three new fields have been created:

These fields will be linked to the project’s tags or properties. To do so, click the […] button, and chose the desired tags on App Browser window.
For each field, select the data type equivalent to the data the source will contain. The available options are:
- fdTExt = text
- fdInteger = integer
- fdDouble = double
- fdDateTime = date/time
For text fields, you must also select the font type and size.
After selecting the data sources and types, click the table’s properties window and the following window will be displayed:
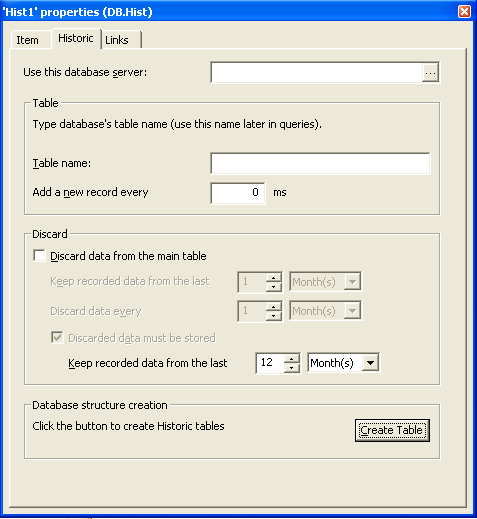
In the first field, set up the name of the database server used by the historic, and then chose a name for the table where the data and the write time will be saved for this historic. This time’s value is in milliseconds, and if it is zero, the historic’s automatic write will be disabled, which will require events to be recorded manually.
On Advanced tab, set up the amount of data that will be kept in disk. You can, for example, set up a historic to keep all data from last month in disk, and to discard them when a new month begins and a new table begins. To do so, just select the amount of data that will be part of the table (1 hour, 1 day, 1 month, etc.) and the number of tables to be kept in disk. In this case, there will be a new table every month, and the last 12 tables will be kept in disk.
Once it’s done, click OK. On the main window, click the button that creates the data structure in the historic. With this, the historic is ready to record data. If you selected to record data per events, just select the desired event and insert the following code line:
Application.GetObject(“Hist1”).WriteRecord
