Whenever similar alarms are set up in different objects in Elipse Power, each alarm’s messages must be edited individually. This can be rather inconvenient, especially when there are a large number of alarms in the application.
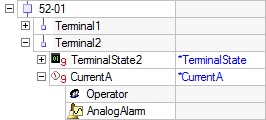
In the example below, a new analog alarm must be created for each current measurement in the application.
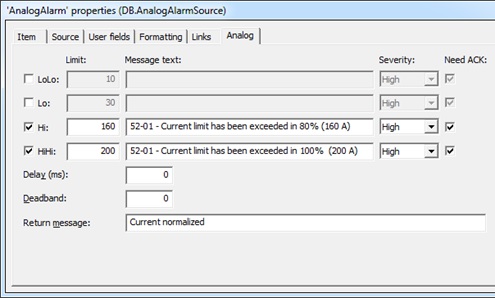
When copying this alarm to a breaker (for example, 52-02), the user will need to change the initial part of both messages. In addition, if they want to change the alarm’s Hi and HiHi limits, they will also need to edit the final part of these messages.
To work around this issue, you can use Default Links. Thus, the task of setting up alarms becomes easier, because it allows the Source to simply be copied to the desired place after being set up, and then to have its alarm limits copied.
In the next example, we will set up an Analog Alarm Source whose Alarm message is structured as:
Where:
- Device_Name: device name (for example, “52-02“)
- Alarm_Description: text describing the message (for example, “Current limit has been exceeded in 80%“)
- Alarm_Limit: alarm limit (for example, “160“)
To create a dynamic alarm message, you must work with links. Each part will be represented as follows:
- Device_Name: @(Breaker).Name
- Alarm_Description: “Current limit has been exceeded in 80%“
- Alarm_Limit: HiLimit
To do so, follow these guidelines:
1. Right-click the first Analog Alarm and select Properties.
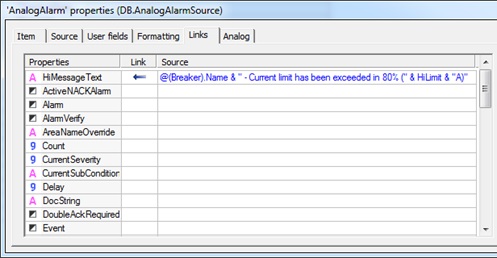
2. When the window opens, select the Links tab.
3. At HiMessageText property, type the expression @(Breaker).Name & ” – Current limit has been exceeded in 80% (” & HiLimit & “A)” on Source column.
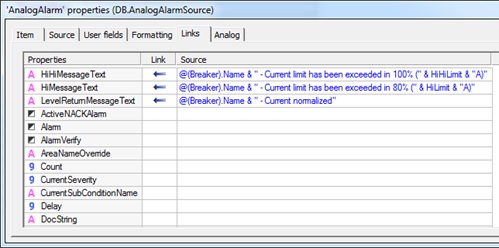
4. Copy the link to HiHiMessageText property, and change the text from “80%” to “100%” (the link can be edited via F2 key). Also change HiLimit property to HiHiLimit in the expression.
6. After these settings, the links will look like this:
After that, the alarm can be copied and pasted to other breakers, keeping the same behavior and with no need for further individual settings.
