The types of databases that are relevant to Elipse E3 users are Microsoft SQL Server and Oracle. For further information about this service, check the Amazon RDS page.
In this article, we’ll ilustrate how the communication between Elipse E3 and SQL/Oracle databases created with Amazon RDS take place. For further information on how to create databases, please check the Amazon support or access blogs and videos on the Internet that specialize in this subject.
Amazon RDS SQL Server
After creating an SQL Server database with Amazon RDS, the following EndPoint will be displayed:

An EndPoint is the address for accessing the database; its function is comparable to that of an IP address at the machine hosting the database. Similarly to physical databases, the default port used by SQL Server is 1433, but this can be changed by the user. In addition to the data at the EndPoint, you will need other information:
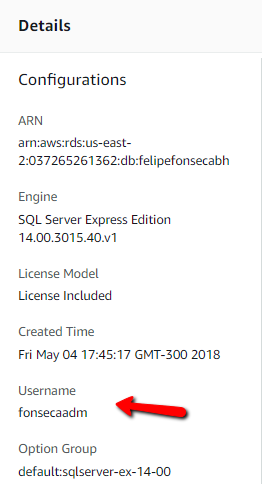
The crucial data here is the username of the database’s admin; this admin is created alongside the database. Once you have this information, you can use the SQL Server Management Studio to connect the DB to the cloud:
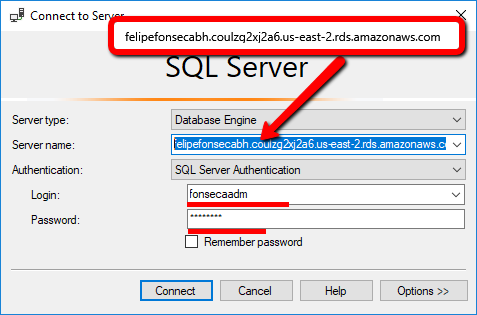
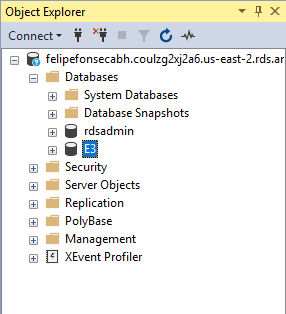
You must add the DB’s EndPoint exactly “as is” at the Server name field. If you change the default port, you will need to alter the Server name field to: String_EndPoint:Number_Port. Make sure you’re using the same credentials of when you created the database. If the configuration is successfull, you will have access to the DB:
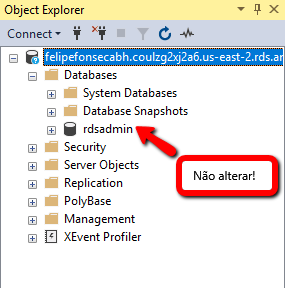
The rdsadmin DB is an internal database used by the system and should therefore not be changed. From this moment on, you will follow the same steps that you would use for a physical database. Therefore, you will need to create a database that stores Elipse E3’s data; and although we haven’t demonstrated this in this article, you will also be able to create new users.
Once you’ve finished this step, you will be able to connect the Elipse E3 to this database. For that, create a DBServer in Elipse E3 with the following configuration:
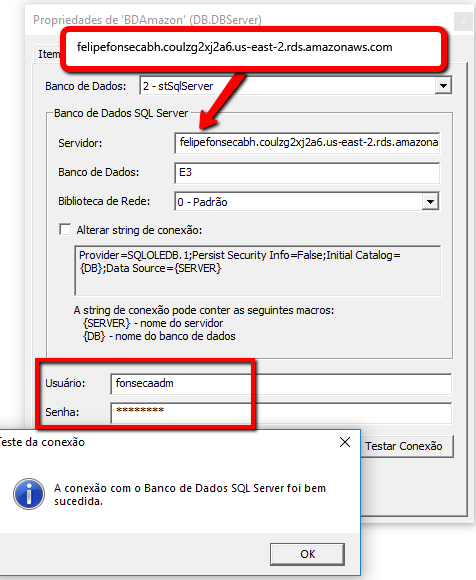
At this stage, you will need to add the name of the database created at the Amazon RDS.
Note that this procedure is very similiar to the one to connect via SQL Server Management Studio.
Amazon RDS Oracle
After creating an Oracle database with Amazon RDS, the following EndPoint will be displayed:
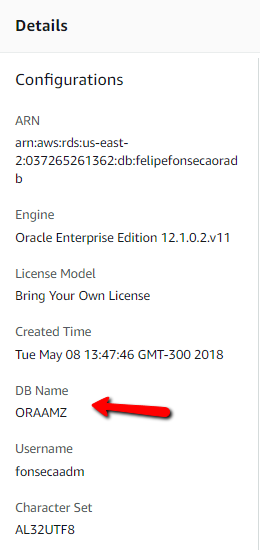
An EndPoint is the address for accessing the database; its function is comparable to that of an IP address at the machine hosting the database. Similarly to physical databases, the default port used by SQL Server is 1521, but this can be changed by the user.
At this stage, what distinguishes an Oracle database from an SQL database is the field DB Name, in addition to Username. This happens because, unlike SQL Server DBs, Oracle databases are not created by the Management Studio, and are actually instanced inside the Amazon RDS system.
In addition to this configuration, you must also make sure you have the Oracle Client 32 bits installed in the same machine as Elipse E3 so that it can connect to the database in the cloud.
Once all these requirements are met, the connection will happen as described in the procedures below.
Connection between Elipse E3 and Amazon RDS Oracle
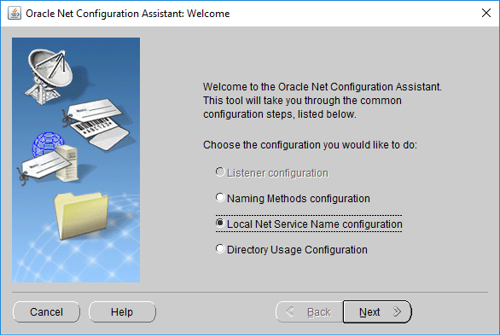
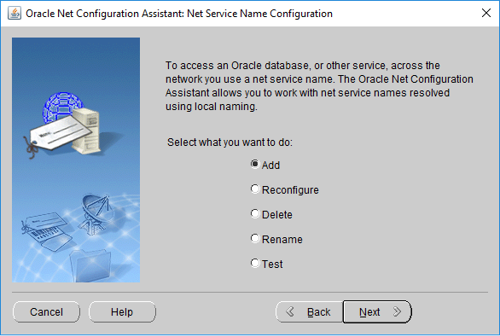
To create a new connection, select Add and click Next.
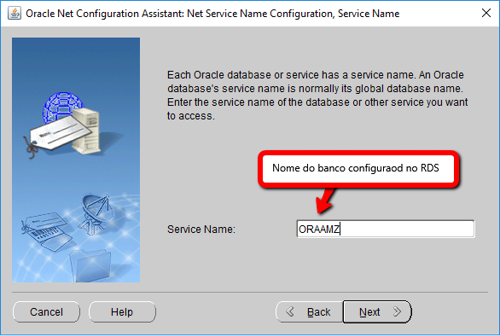
Add the name of the database created at the Amazon RDS.
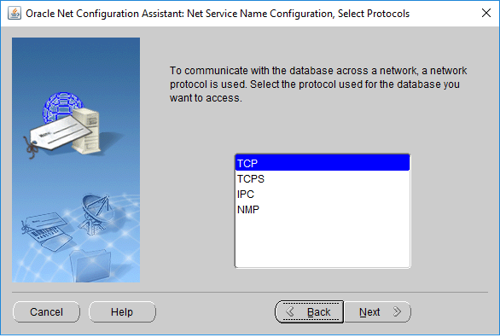
Select the option TCP and click Next.
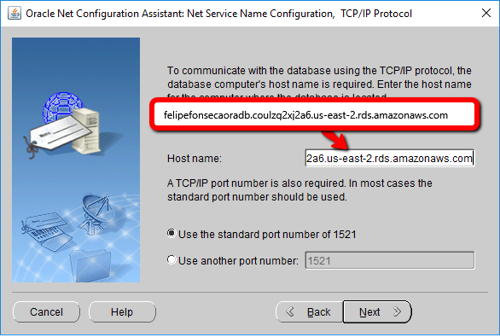
Add the DB’s EndPoint. If you want to change the default port, you will need to do so at this stage.
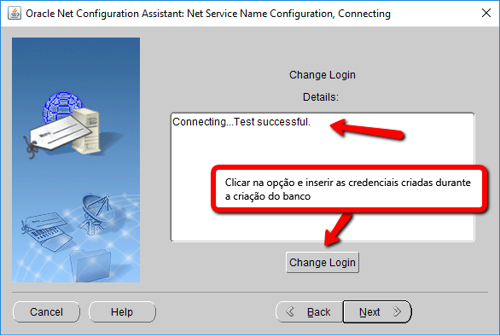
Test the database in order to check if all information were typed properly. To do so, click Change Login and add the credentials of the admin user configured when you created the database.
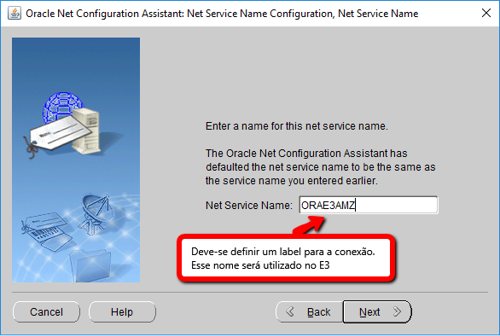
After completing the process successfully, you will need an alias for the newly created connection. You will use the same alias when setting up the Elipse E3 database.
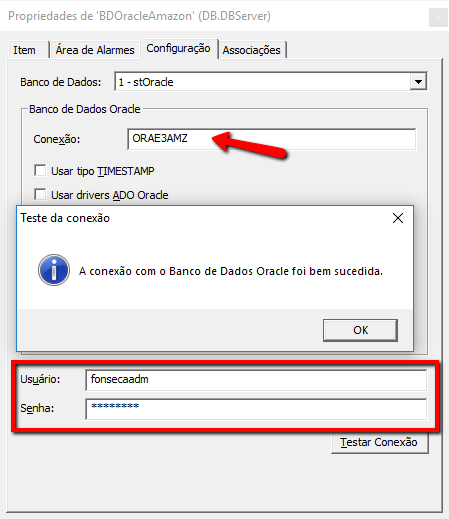
At the end of the process, you will need to create this object in Elipse E3 and set it up as following: