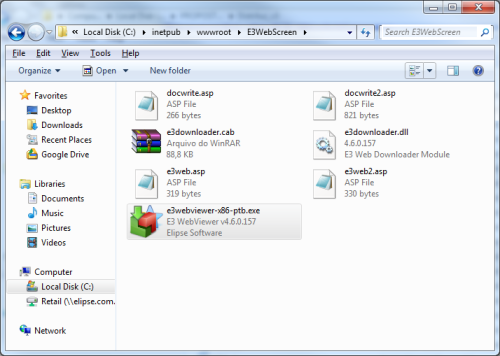
To open different screens in different URLS, create a new folder at C:\Inetpub\wwwroot, and name it as you wish. In it, insert the following files: docwrite, docwrite2, e3downloader, e3downloader.dll, e3web, e3web2, e3webviewer-x86-ptb (see figure below). These files can be found in Web folder at C:\Program Files\Elipse Software\Elipse E3\Web (path where Elipse E3 has been installed).
Open the docwrite2 file with Notepad; it will present the following command lines:
{
// document.location.host returns the server and the port.
// this function returns the name without the port.
return document.location.host.split(‘:’)[0];
}
function writeApplet()
{
var content = ‘‘;
document.write(content);
}
writeApplet();
To open the desired screen, edit the following line:
content += ‘Name of the screen to be opened “>’;
Each folder must have their files pointing to different screens (edited in docwrite2), that is, each folder indicates a different screen to each URL.
Setting up IIS
To set up IIS, follow these procedures:
1. Open IIS settings with Start–Settings–Control Panel–Administrative Tools–Internet Information Services.
2. Right-click Default Website, in the local computer’s Websites folder, and go to New–Virtual Directory.
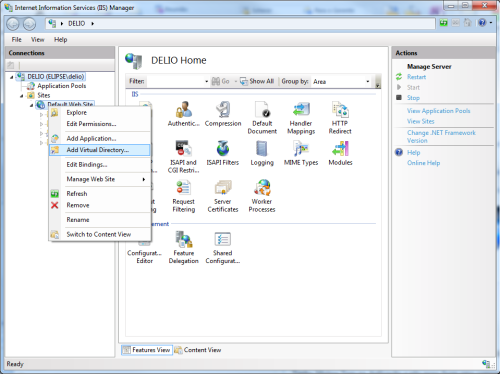
Creating a new Virtual Directory at Internet Information Services settings
3. On the next window, you can use any name. Make sure it is easy to be remembered and typed in the future at the address bar.
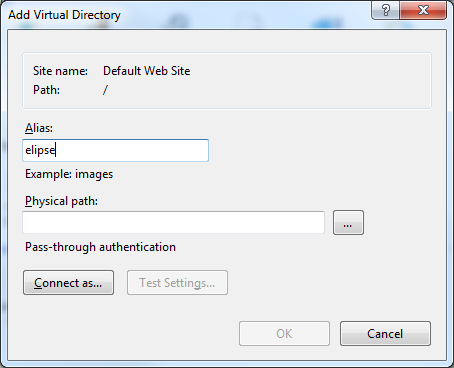
Setting up Virtual Directory’s name
4. The default directory can be freely edited by the user, but we recommend leaving it unedited so as not to add any unnecessary steps to this process.
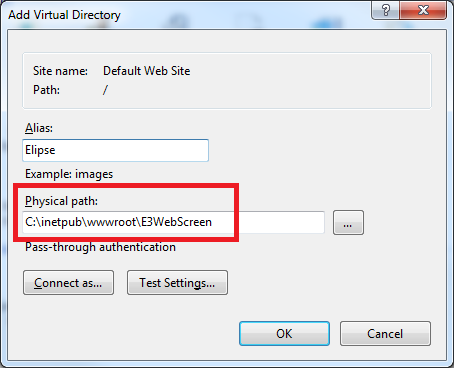
Setting up the published content’s default directory
5. After you finish these settings, you will need to establish which file will be executed as soon as the user presses ENTER button after typing the browser’s address.
6. Right-click the new Virtual Directory, and select Properties.
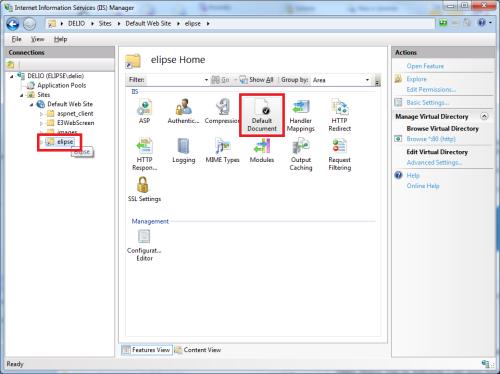
Accessing Virtual Directory’s properties to set up a default file
7. Use Remove button to remove all available documents at Default Documents. Then, use Add to add e3web.asp file. This is the file that will be called whenever the user accesses the site where the application is being hosted.
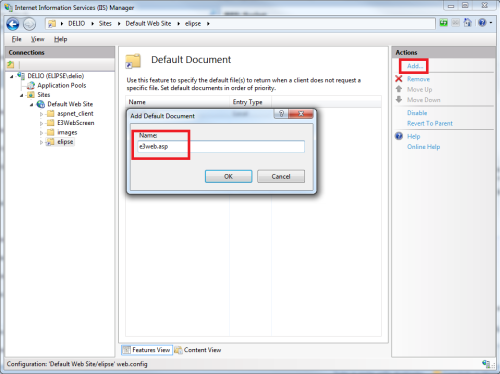
Adding files to the default documents list
Editing the application’s security options on the web
8. To visualize the application, just type the server’s address or IP at the browser’s address bar (for example, http://server/virtualdirectory).
These settings have to be made as many times as the number of screens (folders) you want to open. The folder whose screen will be opened must be pointed by Local Path and Directory.
