Introduction
In order to set up NodeMCU and communicate with it via driver MQTT driver, firstly you will need to develop a programming to publish the NodeMCU information in a broker. Regardless of the broker you use, the driver will require settings in the following fields to be able to work properly:
- Server
- Port
- User
- Password
In this article, we will show you how to retrieve information from CloudMQTT servers, in the cloud, as well as from Eclipse Mosquitto, local server, to communicate with NodeMCU via MQTT driver in Elipse environment.
CloudMQTT
After registering at CloudMQTT, you will be able to see the necessary information for the connection on the Details tab:
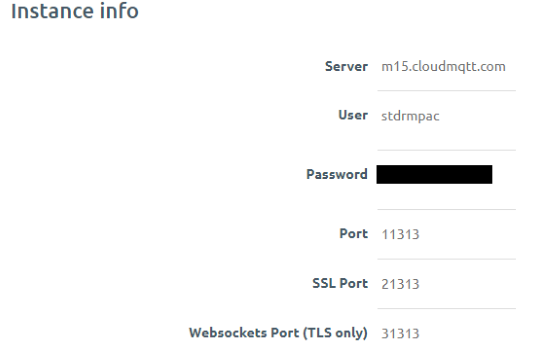
NOTE: To confirm whether the NodeMCU is publishing properly in this broker, you can check the incoming messages on WebSocket UI tab.
With this information at hand, you can set up the MQTT driver to colect the incoming messages.
After adding the driver to the application, access the driver settings on General tab, and set up the user and password given at CloudMQTT broker’s Detail page; then, set up a name to identify the driver at Client ID field.
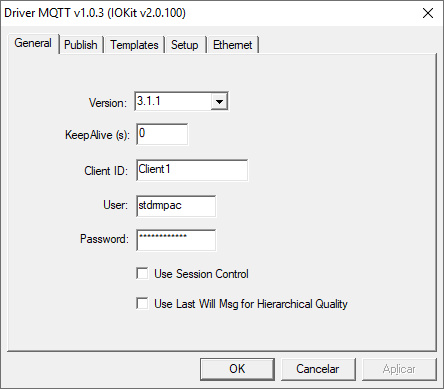
NOTE: always use different names for each client. When a name is repeated, one will disconnect the other.
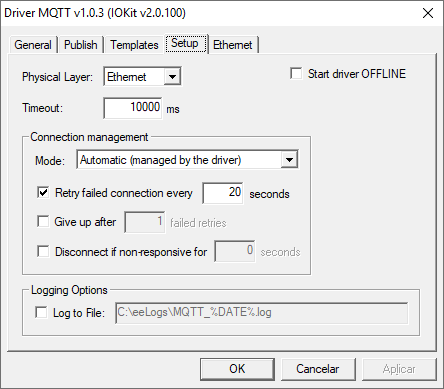
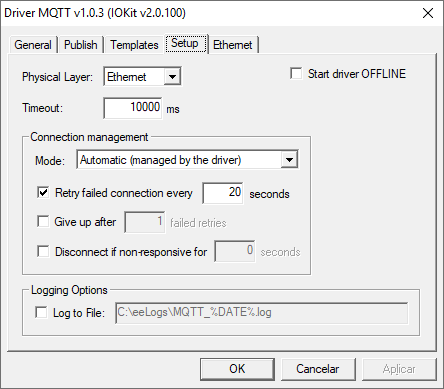
On Setup tab, check Ethernet and add a Timeout compatible with the connection.
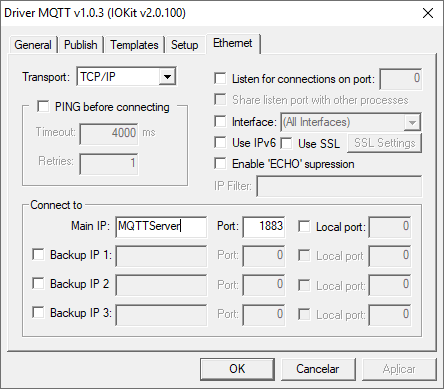
Then, access Ethernet tab and add the Main IP, which is the name of the broker, and the port used for connection.
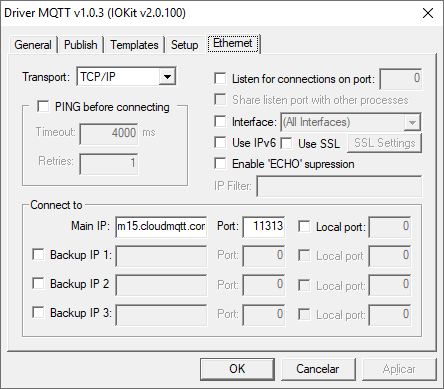
After that, you can now set up the tags that read the incoming messages.
Eclipse Mosquito
To install and set up the Eclipse Mosquito, you can check up this article (in Portuguese only).
After adding the driver to the application, access its settings and, on General tab, set up a name fro the driver (in this case, Client ID).
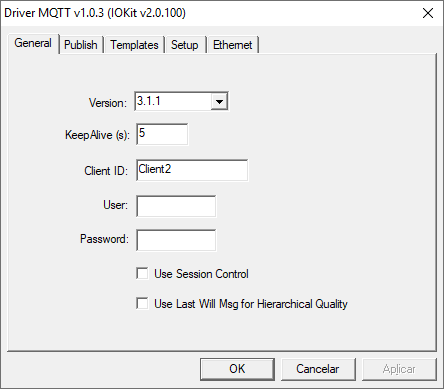
On Setup tab, check Ethernet and add a Timeout compatible with the connection.
Then, access Ethernet tab and add the Main IP, which is the name of the broker, and the port used for connection.
After that, you can now set up the tags that read the incoming messages.
Tags Settings
Setting up tags is a fairly easy task. All you need to do is set up the Item parameter according to the message programmed at NodeMCU. For example:


NOTE: N parameters are not used in this case.
After that, you will be able to read the return from the server.

