To connect an Oracle database server to E3 you have to install and configure an Oracle client x86 software program, through which the connection is performed.
This article details the installation process of this support, to allow Oracle to be the default database for an E3 application. Oracle’s 10g version is used here to illustrate the process.
2) Configuring Oracle Client
Before you start setting up the Oracle client, first check a few points with the database administrator, which are:
- Name of the Oracle service in the network (throughout this article, this will be referred to as elipse.elipse.com.br).
- Name of the machine where this service is running (throughout this article, this will be referred to as test).
- Oracle’s default port (in this case, 1521).
- User and password to log in the database.
NOTE: For the proper working of the connection, it is necessary for some ports between client and server are open. Default port is 1521, but after the connection had been established, some other ports can be used.
Step by step:
1) Access Net Configuration Assistant.

2) A screen is open; on it, select the option Local Net Service Name configuration.
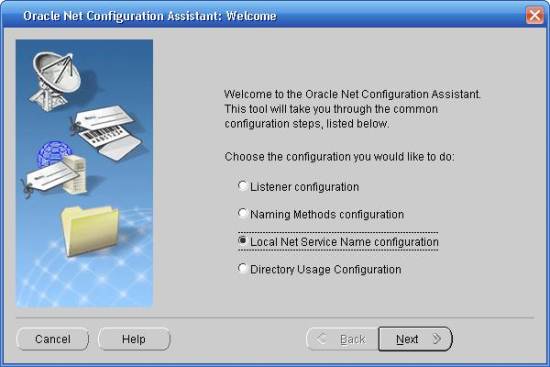
Figure 2
3) Click Next; then, select the option Add to add a service.
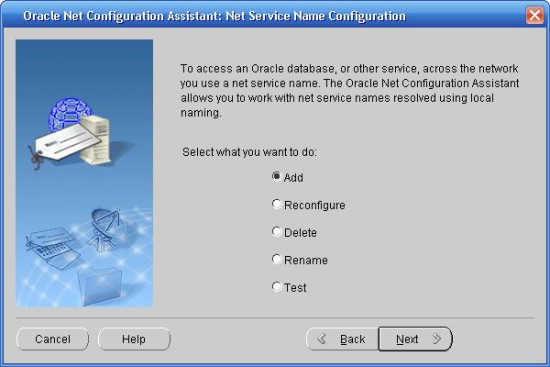
Figure 3
4) Next, you will configure the service’s name. This should be the same name as the one configured in the previously installed database.
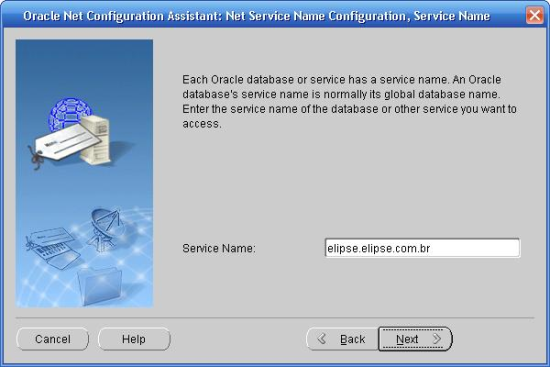
Figure 4
5) Then, chose the protocol for accessing the database.
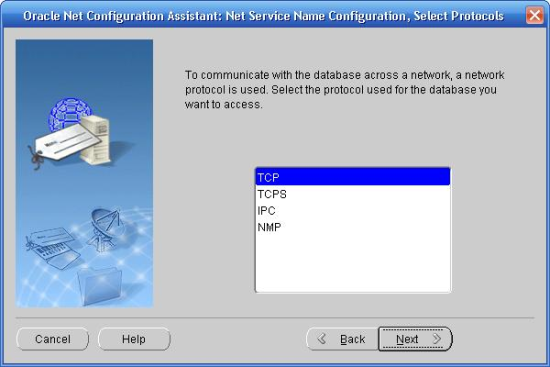
Figure 5
6) On the next screen, you will configure the name of the computer where the database is (in the example, test), and the default access port (in the example, 1521).
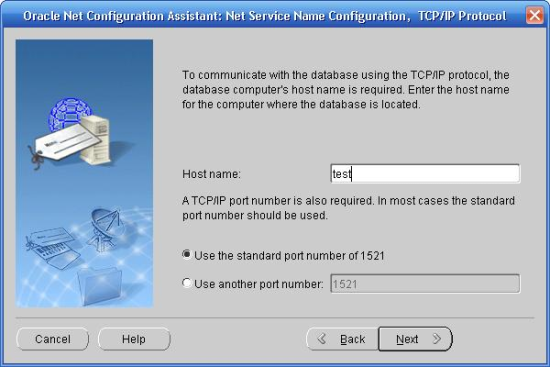
Figure 6
7) The next step is testing the connection.
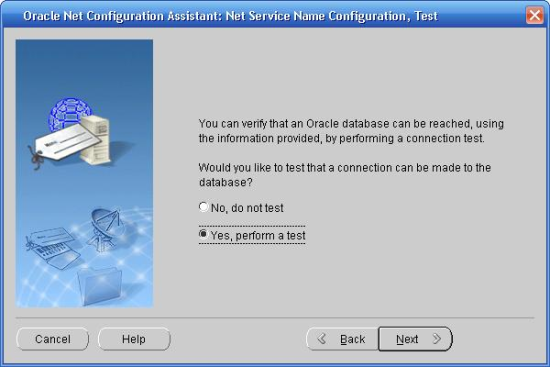
Figure 7
8) If all configurations were made appropriately, the following screen is shown.
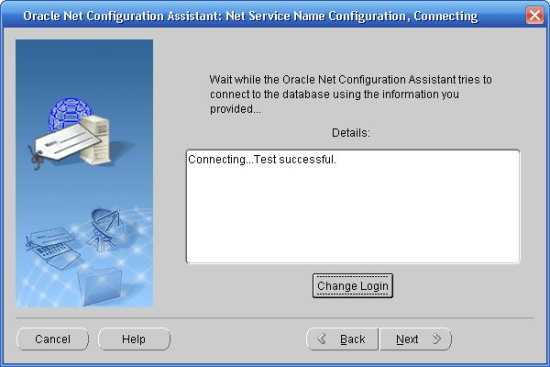
Figure 8
In case a screen is displayed informing you it has not been possible to connect to the server, check the login and password to see if they were correctly informed.
9) The next screen supplies the Net Service Name, that is, the name of the connection used by the applications to access the database through this client. This is the name to be used when configuring E3.
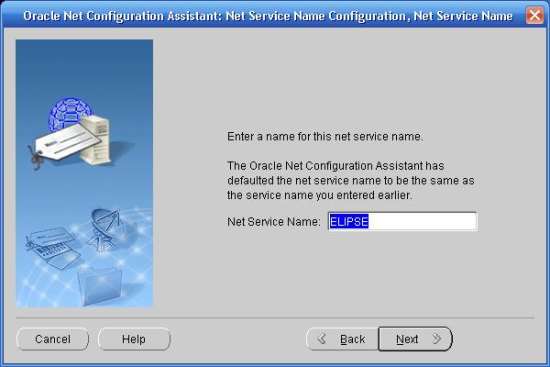
Figure 9
10) FINISHED! With all these steps, you have successfully configured Oracle client.
3) Setting up an E3 application
After having configured Oracle client, you will have to configure your E3 application to access the database’s server through this client.
Step by step:
1) First, open the application, and add a DataServer object to it. To do so, you must right-click on the project, and then select the option Insert—Database.
2) Once the database is inserted, it must be configured. To do so, you must access the object’s properties.
3) Configure the following items on Database’s properties screen:
• Database: indicates the type of database being used. Choose 1 – stOracle.
• Connection: Name of the Net Service Name (previously configured). In this example, the value is ‘elipse‘.
• Use TIMESTAMP type and Use ADO Oracle drivers: these options must be checked when you use Date/Hour information with precision of milliseconds (TIMESTAMP); further information can be found at E3’s User’s Manual.
• User and password: fill these fields with the information received by the database’s administrator.
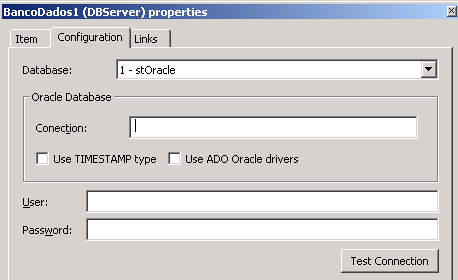
Figure10: Database’s properties
4) Press the button Test Connection; if the database was correctly configured, a window will be displayed to confirm a successful operation.

Figure 11: Connection Test
5) FINISHED! Your E3 application is ready to connect and exchange information with the Oracle database.
4) Further information
For more information, see Using Oracle Databases from Elipse E3.
More information on Oracle 10g database can be found on its own documentation.
NOTE: Oracle’s 10g version is only compatible with E3’s 2.5 version, or higher. Previous versions of our software cannot be used with the database’s 10 g version.
Check E3’s User’s Manual and Scripts: Reference Manual for further information on Database’s methods and properties.
