*For Windows XP/2003/Vista/2008, click here*
1) Elipse DCOM Wizard
Elipse DCOM Wizard is a wizard to configure DCOM (Distributed Component Object Model) and Windows Firewall to allow remote connections. It displays predefined settings for the main products by Elipse Software, but it can be also used to configure third-party products. By running the wizard, the settings described below are applied automatically.
Elipse DCOM Wizard Download.
2) Introduction
Firewalls are barriers interposed between a private network and an external network, in order to prevent attacks or invasions. That is, they are security mechanisms (devices) that protect the company’s hardware and software from the dangers to which the system is exposed. These security mechanisms are both hardware- and software-based, and follow the security policy established by the company.
Microsoft’s COM (Component Object Model) is a distributed, platform-independent, object-oriented system for creating binary software components that can interact with each other. DCOM (Distributed Component Object Model) allows applications to be distributed to the most relevant sites for the user and for the application. DCOM connection protocol offers transparent support, for a reliable and efficient communication between COM components. For this reason, this is the protocol used in OPC drivers.
In order to have the Elipse systems functioning properly, you will need to make some adjustments in the settings of Firewall and DCOM, as discussed below. These settings must be performed both in the server and in the client
machines, regardless of how communication takes place (either between
Elipse modules or between OPC client and server).
3) Firewall
To access the Firewall settings, a shortcut is available in the Control Panel (Fig.1).
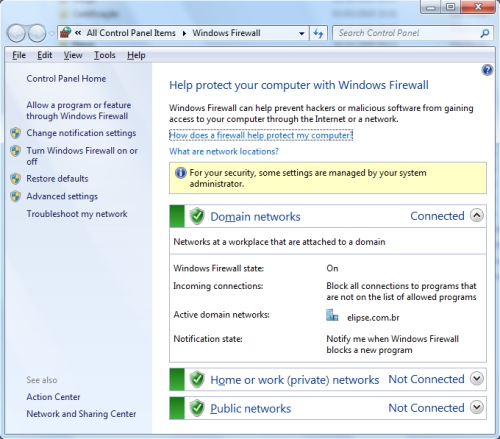
Figure 1 – Activating the firewall
If you choose to disable the Firewall, no further action is required to operate the OPC Server or any other feature of Elipse products (notice however that it will still be necessary to follow the instructions contained in the DCOM session). In case you need to activate the firewall, a few other steps must be followed. First, you must allow a few programs to communicate through the firewall in the window Allow programs to communicate through Windows Firewall (Fig. 2).
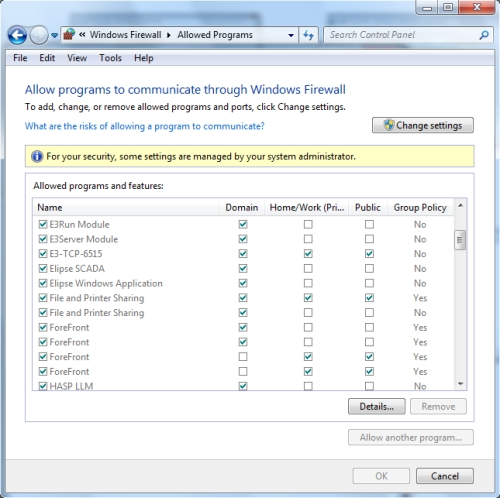
Figure 2 – Allowing communication through the firewall
Basically, you should add E3Server.exe, E3OPCClient, E3Run.exe, and Studio.exe for E3, or Elipse32.exe for Elipse SCADA. For Elipse OPC Drivers, add ED_OPC.exe. You must also add Opcenum.exe, found at C:Windowssystem32 (in 32-bit Windows) or C:WindowsSysWOW64 (in 64-bit Windows), which will enable remote connection with OPC clients.
In addition to these programs, you must also create new input rules to allow ports 135 (TCP and UDP) and 445 (TCP), used by DCOM, and 6515 (TCP), responsible for connecting the Viewer to E3Server and Hot-Standby, and for connecting the Studio to a remote E3Server. This can be done by clicking Advanced Settings option on the Firewall homepage (Fig. 3).
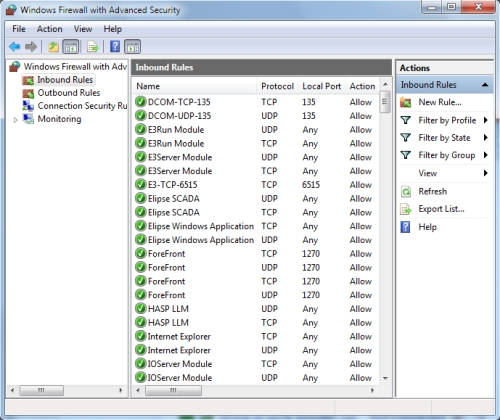
Figure 3 – Allowing ports
Once this is done, the application is ready to work with the Firewall.
4) DCOM
To configure this option from the user interface, the administrator must open the Component Services Manager (DCOMCNFG) and select Properties from the context menu of the computer being set (Fig. 4).
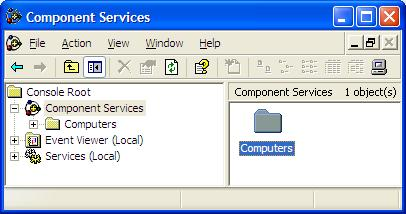
Figure 4 – Selecting the computer to be configured
A dialog box will be displayed (Fig. 5), and security must be configured on COM Security tab.
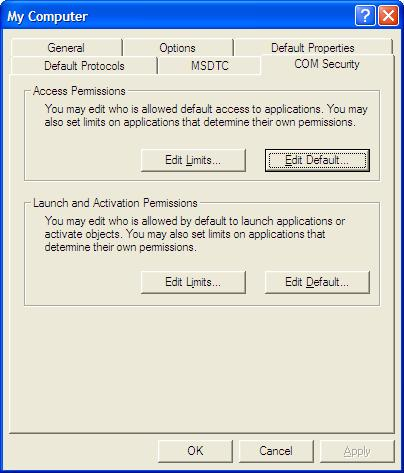
Figure 5 – Configuring security
Click Edit Limits… on Access Permissions, add users ANONYMOUS LOGON, Everyone, and SYSTEM, and check the options Local Access and Remote Access for these users (Fig. 6).
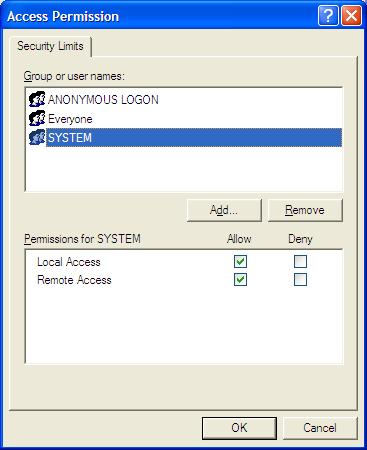
Figure 6 – Setting access permissions
Click Edit Limits… on Launch and Activation Permissions, add users ANONYMOUS LOGON and SYSTEM, and check the options Remote Launch and Remote Activation for these users. You must also check these options for user Everyone (Fig. 7).
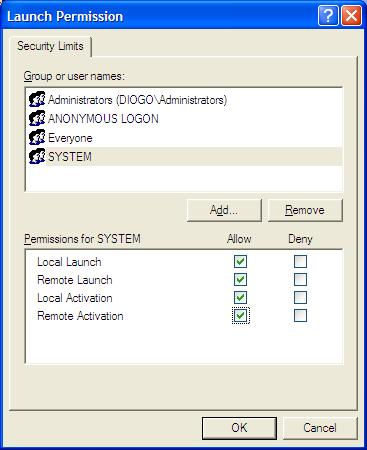
Figure 7 – Setting launch permissions
You must then grant E3Server‘s access, initialization, and remote activation permissions to ANONYMOUS LOGON user. To do so, right-click E3Server and select Properties on its context menu (Fig. 8).
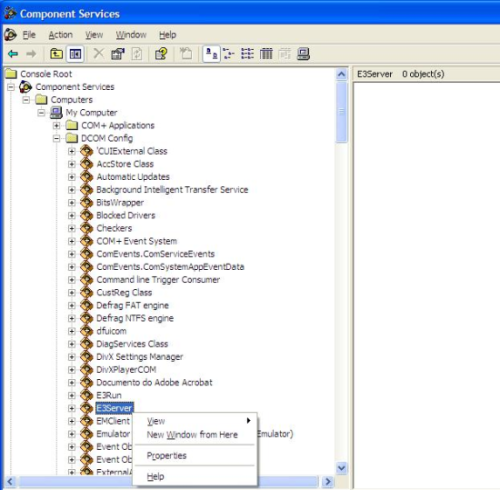
Figure 8 – Selecting E3Server’s properties
Select Security tab (Fig. 9).
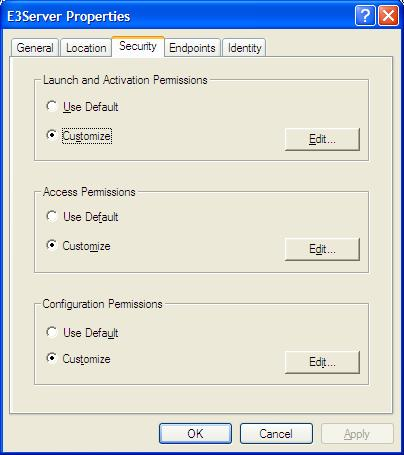
Figure 9 – Setting E3Server’s security
Click Edit on Launch and Activation Permissions, add user ANONYMOUS LOGON, and check the options Remote Launch and Remote Activation (Fig. 10).
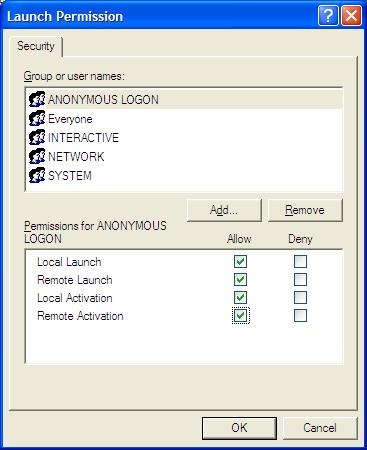
Figure 10 – Setting E3Server’s launch permissions
Click Edit on Access Permissions, add user ANONYMOUS LOGON, and check the option Remote Access (Fig. 11).

Figure 11 – Setting E3Server’s access permissions
After that, you must grant E3Run‘s access, initialization, and remote activation permissions to ANONYMOUS LOGON user. To do so, right-click E3Run and select Properties on its context menu (Fig. 12).
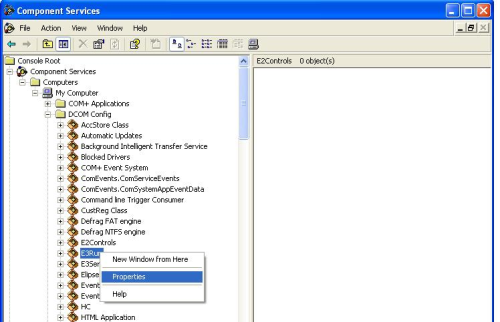
Figure 12 – Selecting E3Run’s properties
Select Security tab (Fig. 13).
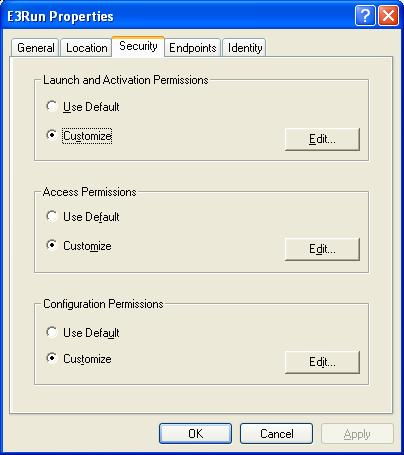
Figure 13 – Setting E3Run’s security
Click Edit on Launch and Activation Permissions, add user ANONYMOUS LOGON, and check the options Remote Launch and Remote Activation (Fig. 14).
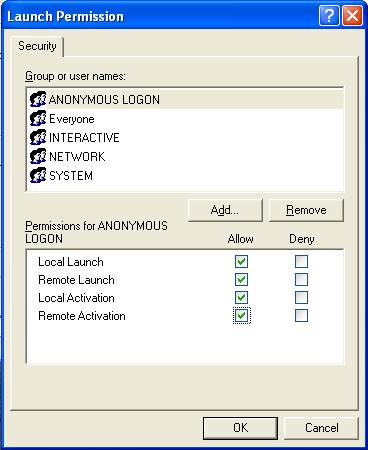
Figure 14 – Setting E3Run’s launch permissions
Click Edit on Access Permissions, add user ANONYMOUS LOGON, and check the option Remote Access (Fig. 15).
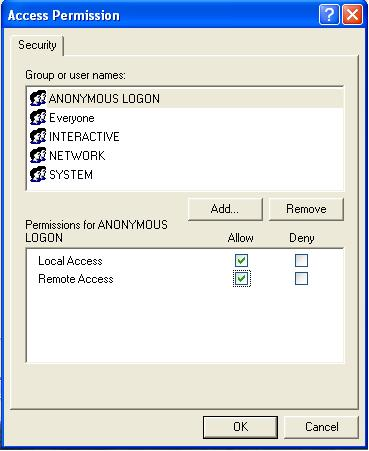
Figure 15 – Setting E3Run’s access permissions
Finally, if the application uses OPC, you must also grant OpcEnum‘s access, initialization, and remote activation permissions to ANONYMOUS LOGON user. To do so, right-click OpcEnum and select Properties on its context menu (Fig. 16).
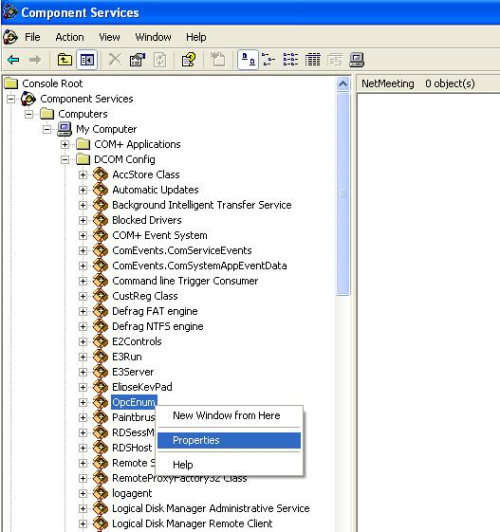
Figure 16 – Selecting OpcEnum’s properties
Select Security tab (Fig. 17).
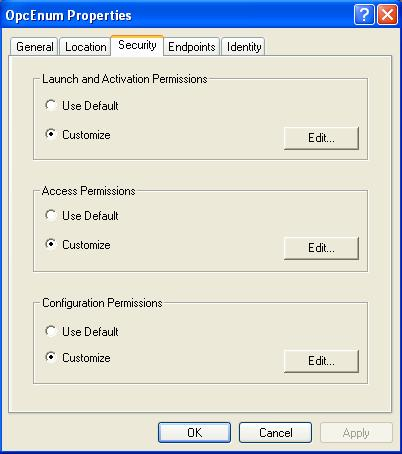
Figure 17 – Setting OpcEnum’s security
Click Edit on Launch and Activation Permissions, add users ANONYMOUS LOGON and SYSTEM, and check the options Remote Launch and Remote Activation (Fig. 18).
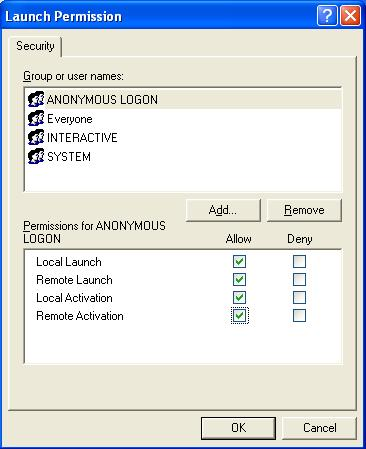
Figure 18 – Setting OpcEnum’s launch permissions
Click Edit on Access Permissions, add users ANONYMOUS LOGON and SYSTEM, and check the option Remote Access (Fig. 19).
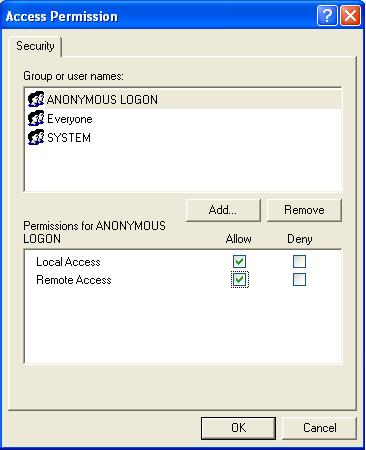
Figure 19 – Setting E3Run’s access permissions
NOTE: It is essential that all computers on the network use the same settings suggested in this article, otherwise they too will refuse the connection to the OPC Server.
5) Network
To establish OPC communication with the
settings in this article, all the computers involved must be in the same
Microsoft domain, or at least in Work Groups with necessarily the same
user and the same password in all computers (the user won’t necessarily
need to be logged in, only to have been already created).
All computers in the network must be able to “spot” each other by their names to exchange information; sharing only the IP or a folder won’t be enough for establishing OPC communication.
